
As an Amazon Associate I earn from qualifying purchases.
I am on a makeover kick! Since we have been home for about 3 months now, it’s given me time to tackle all the things I’ve wanted to do for years! Today’s project – Our Foyer Hall closet makeover for less than $50!
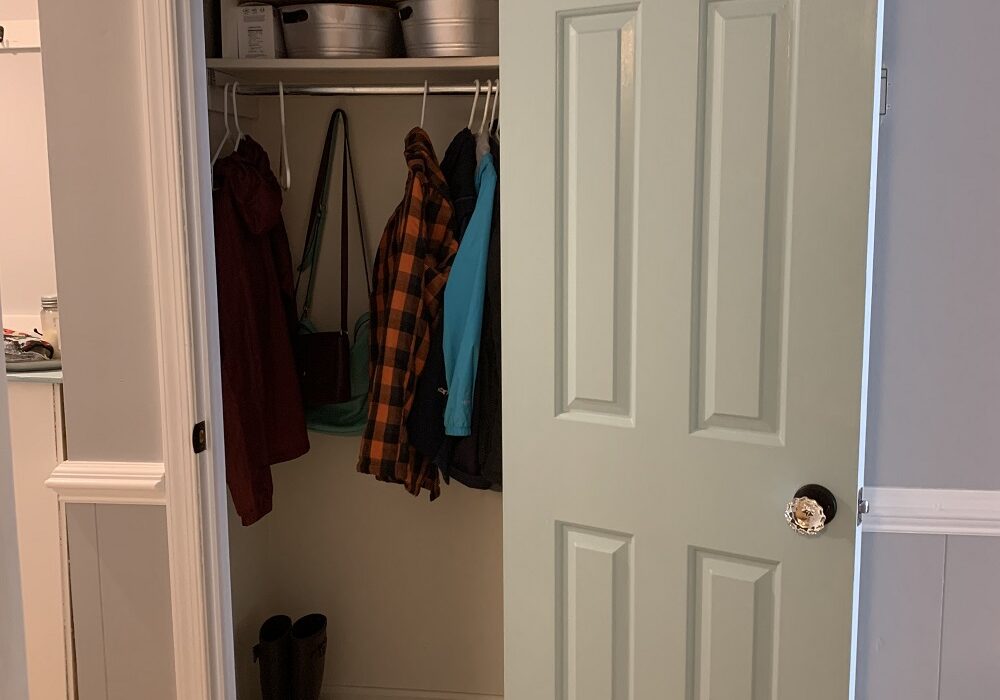
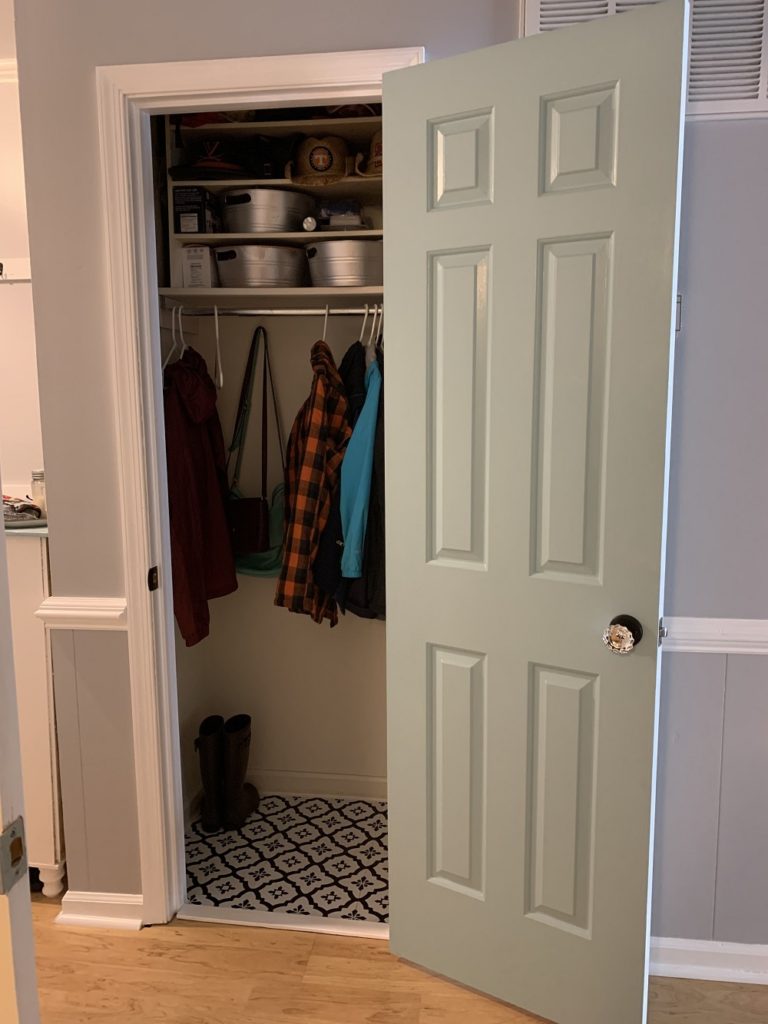
For years this has been the place where we open it up and just throw! Well not anymore! BUT I do love it so much that I would be happy to leave the door open all the time so people can see how gorgeous it is!
Starting organized
I organized (somewhat) a few months ago. I added stack-able shelves to the top and painted Dollar Store buckets to hold all the loose things (batteries in one, light bulbs in another, you get it). So that part was organized, but I still wanted it to be something I didn’t mind guests opening up and hanging their coats.
So let’s begin!
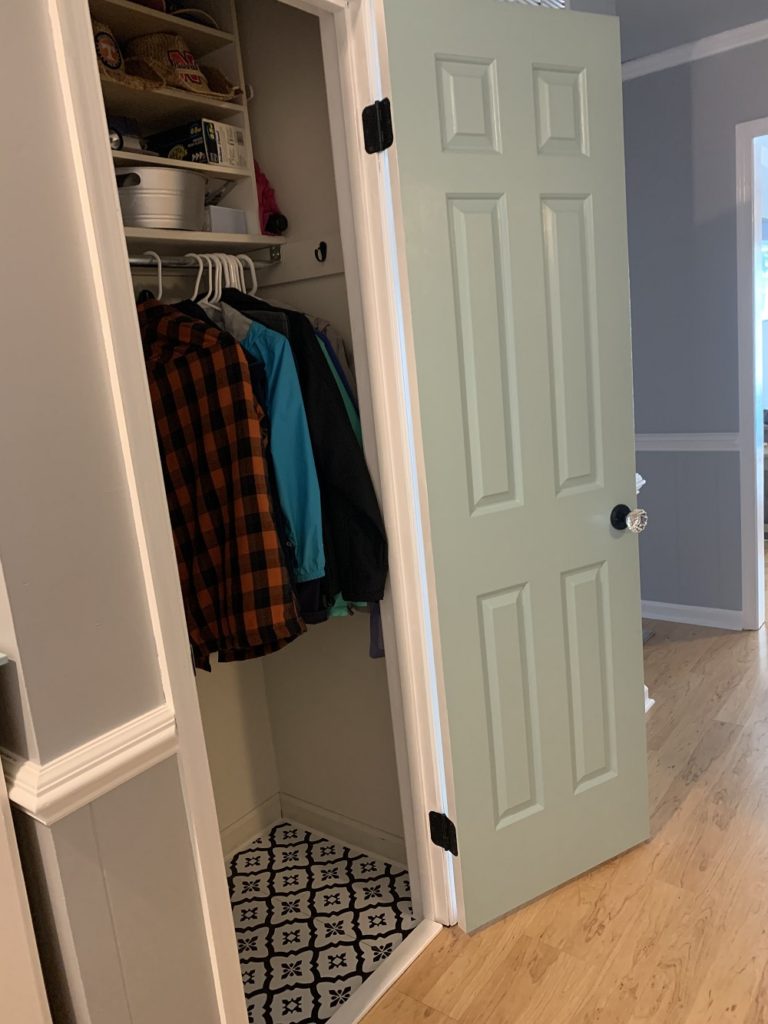
It all started with the door
When you first come in the house, this is what you see. I wanted to make sure it matched my decor. I wanted it also so stand out. I painted the outside of the door the same white as the rest of the house. BUT to make a statement I painted the inside of the door the blue that I use as an accent throughout the house.
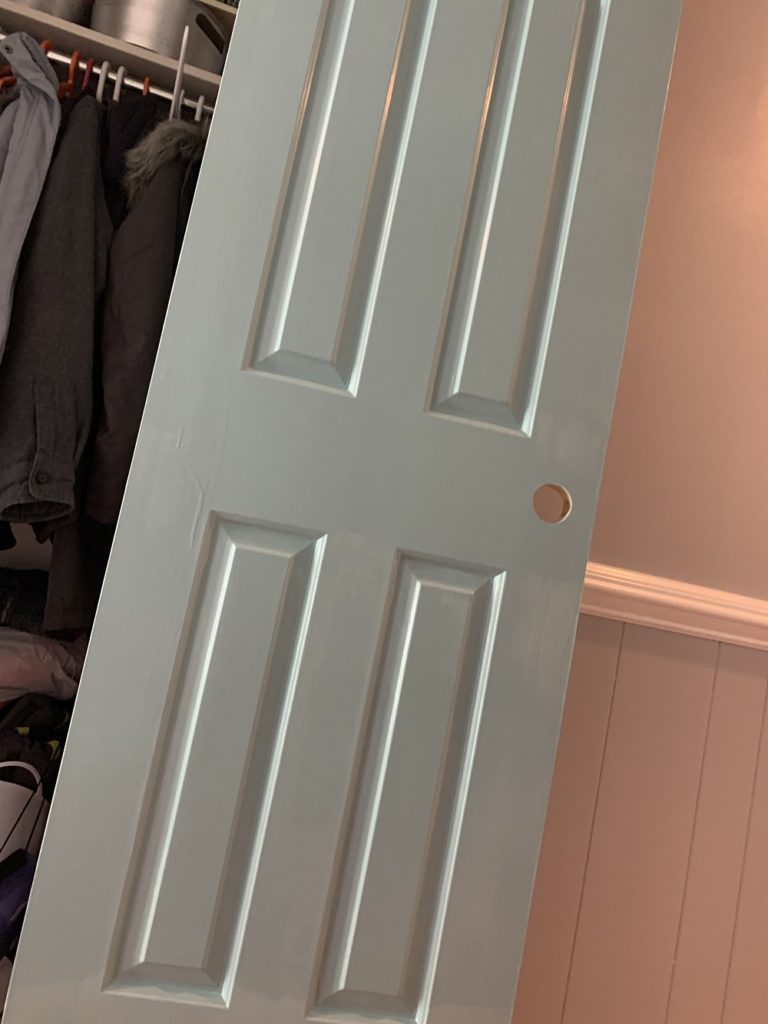
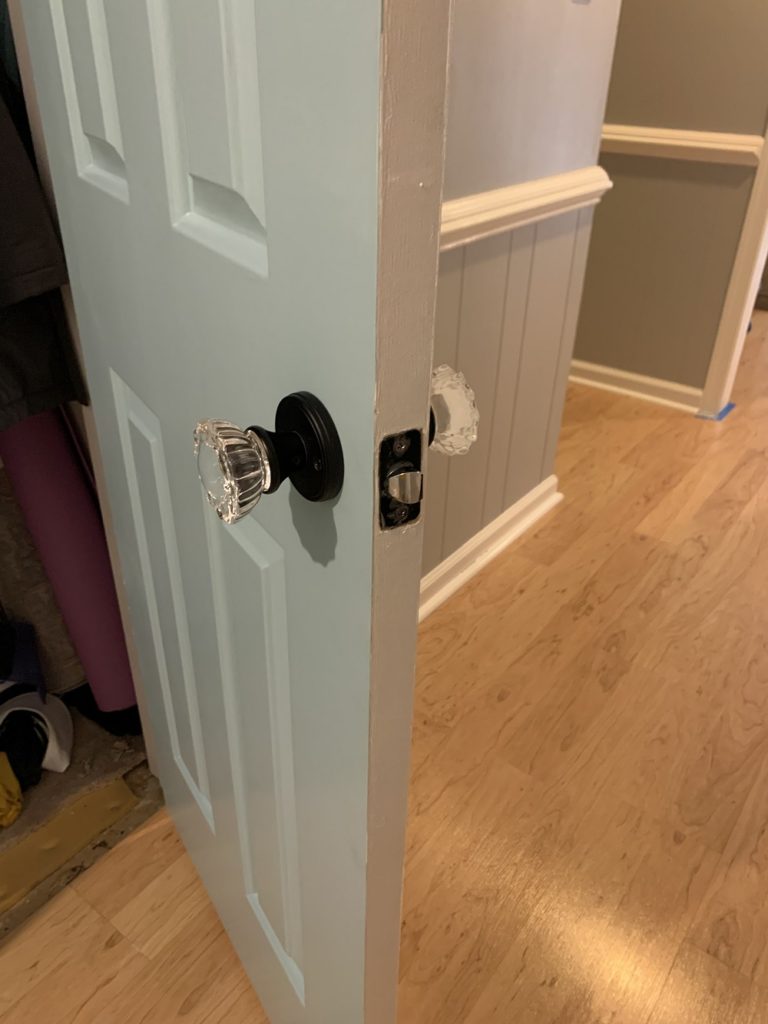
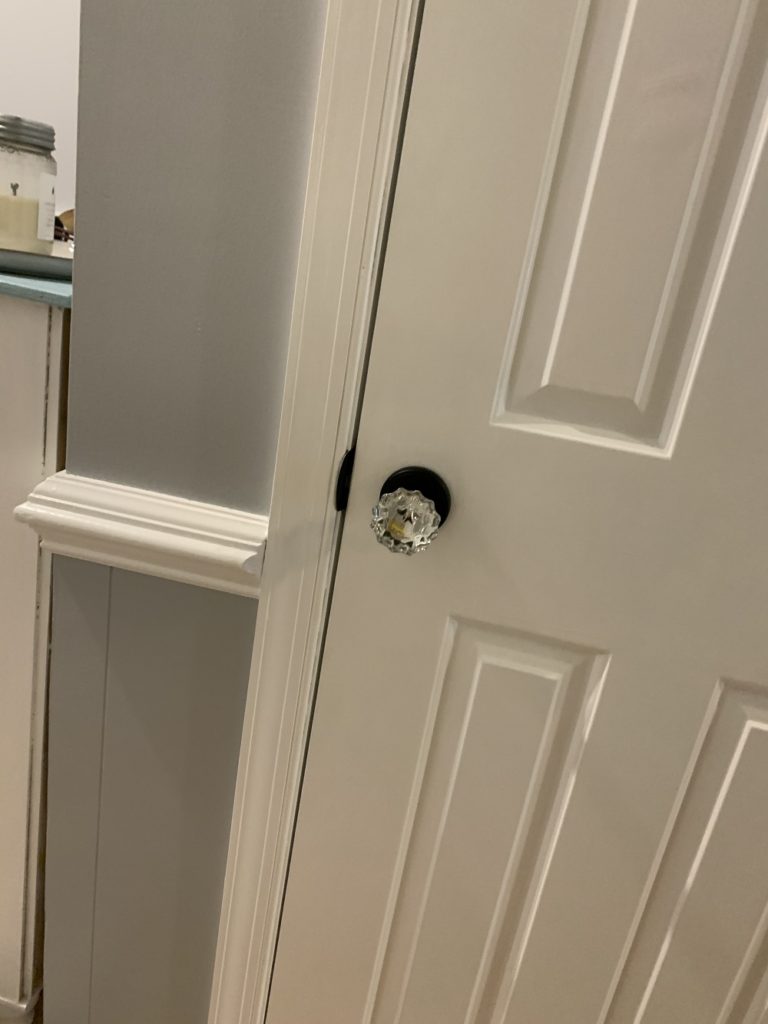
I am in the process of changing out all the door hardware throughout the house. I found cheap black hinges for bulk and grabbed those up. But instead of the same doorknobs as the rest of the house I wanted something that made a statement. So I found this gorgeous vintage style glass doorknob and thought it was perfect! I love how the door itself turned out.
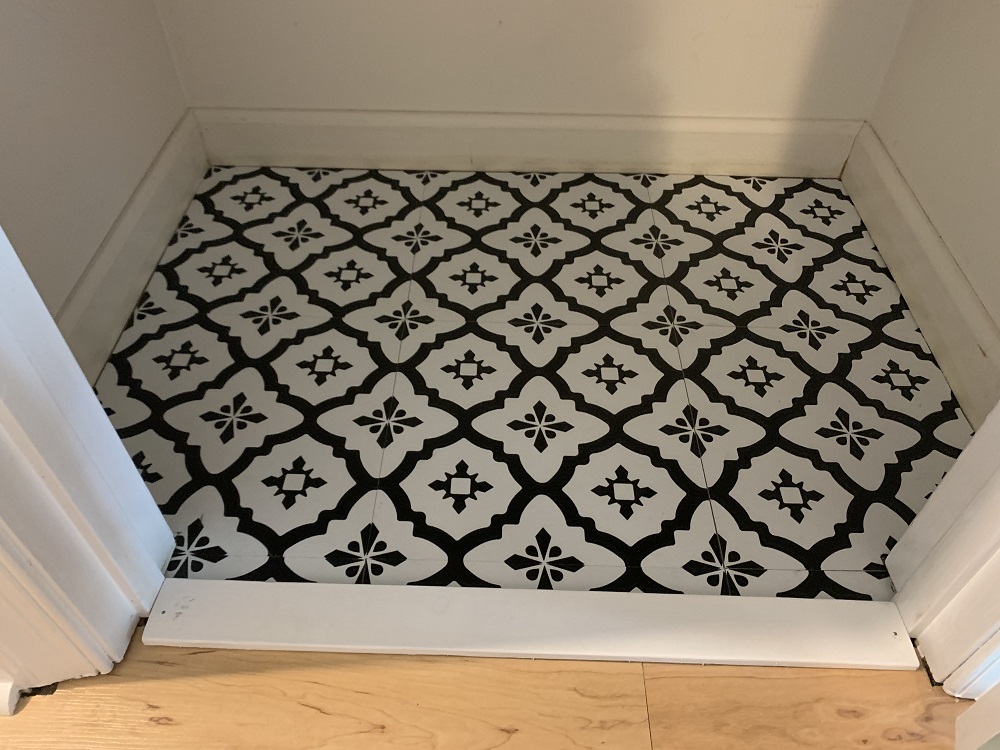
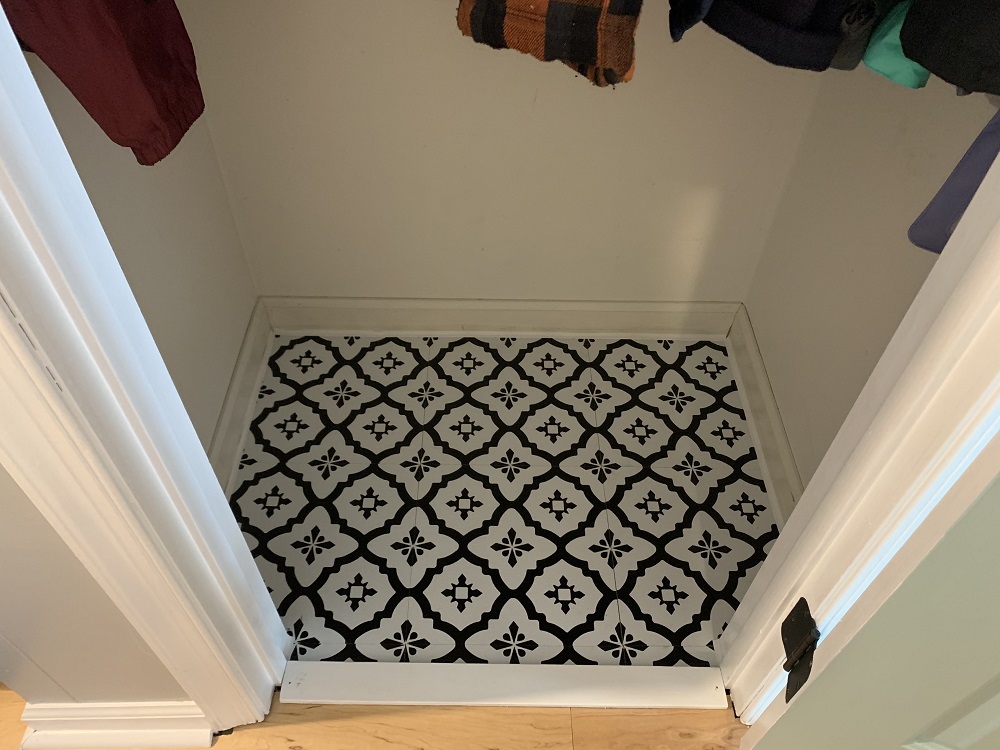
And then came the floor
But wait, I’m not done!!!
About 11 years ago, we pulled up the carpet in most of the house and put down laminate wood. For some reason though we left the carpet in this closet (none of us know why and I’m slightly embarrassed to even admit that I left it like that for 11 years!).

Up came the carpet!
I found these fun gorgeous peel and stick tiles and grabbed them up. I only needed one box to do this closet, so it was perfect! The color goes with the color accents throughout my house, the style fits perfectly in with my farmhouse vintage theme. But most importantly, they were super easy to install. I installed the entire closet in one evening, took me maybe an hour and that including cutting pieces! It was so super easy!
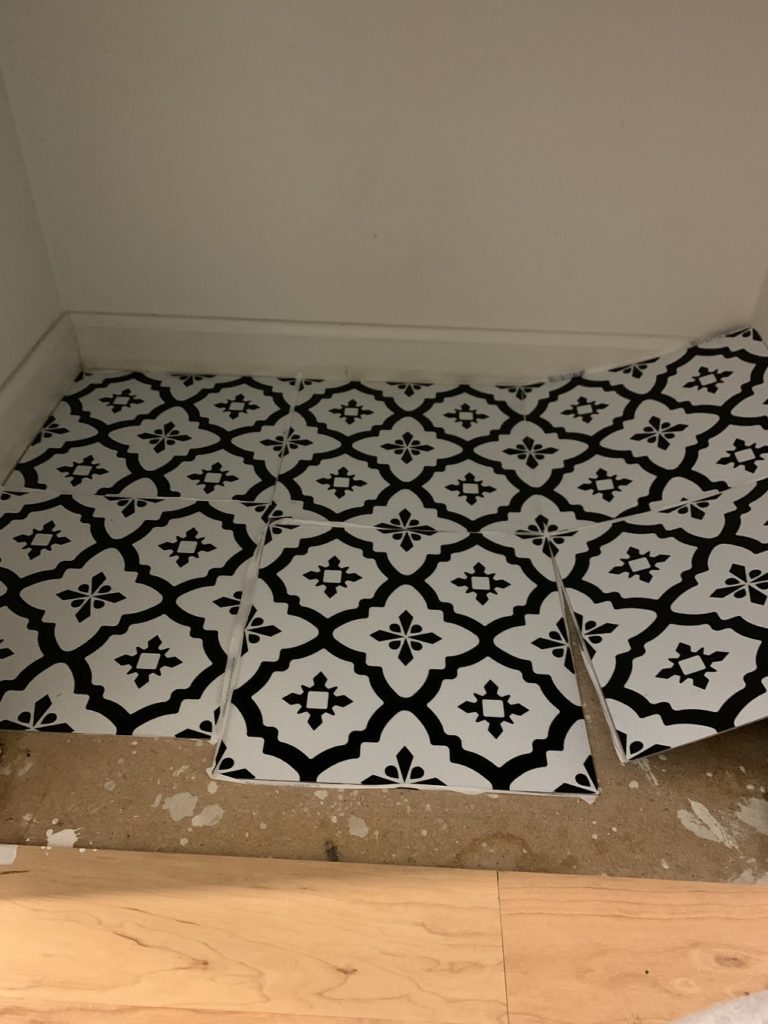
If you follow the directions on the box, it will tell you to begin in the middle of the “room” and work out towards the walls. This would of worked great except that my “room” was not large, it was a small closet. So to prevent cutting every tile piece, I started in the back corner and worked my way to the front of the closet. I’m such a rule breaker!
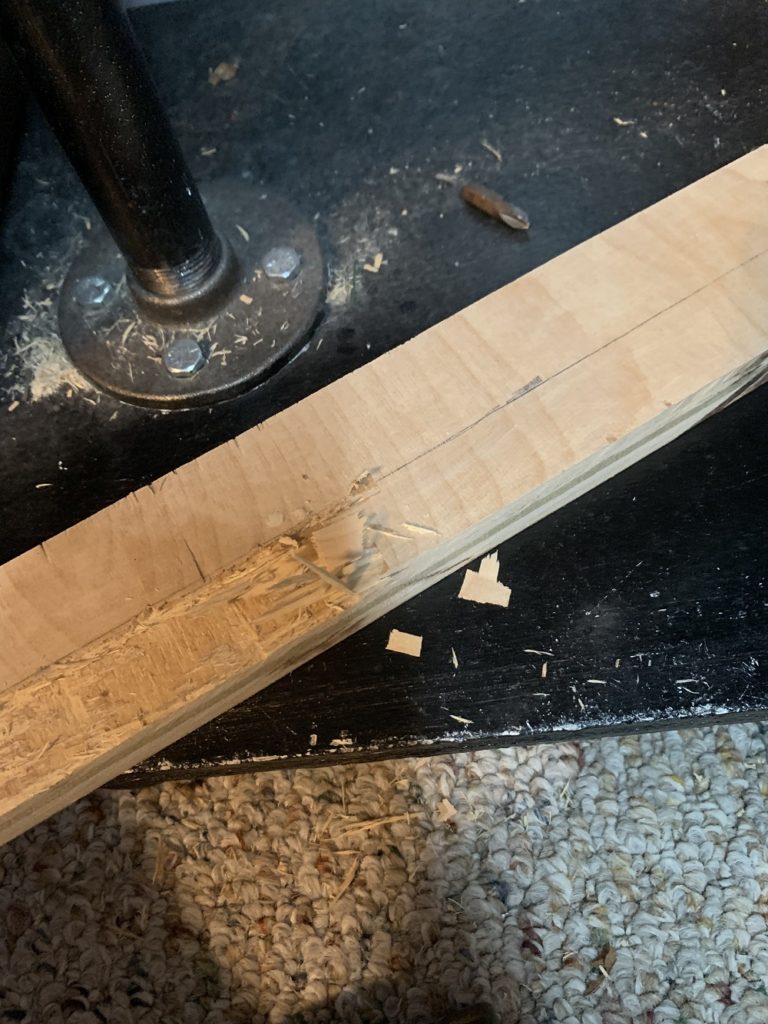
Next I needed a transition piece from the laminate to the tiles. There is a bit of a gap in size, so I needed to do something that would accommodate that. I searched Amazon (cause you know they have everything) and while I found pieces, I wasn’t going to spend an arm and a leg! So back to the drawing board.
I ended up having my husband cut me a piece of wood that was the length of the width of the closet. I then took my handy chisel and started chiseling the underside of the wood to accommodate the drop. It was a tedious task, but that’s ok, remember I have the time!
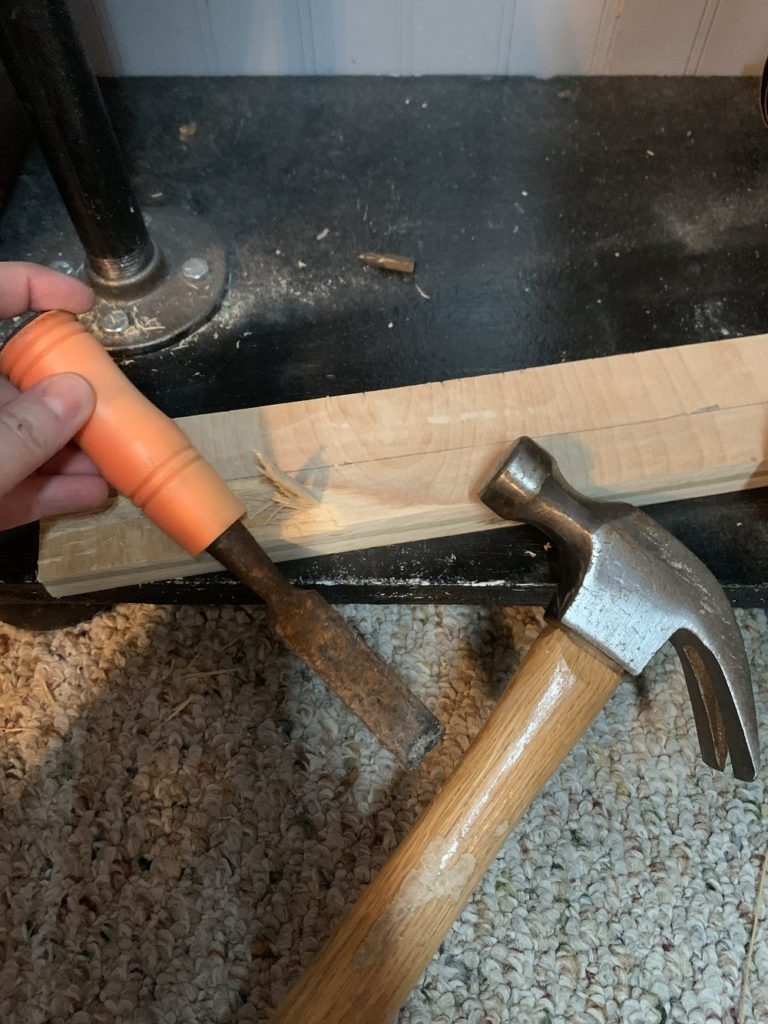
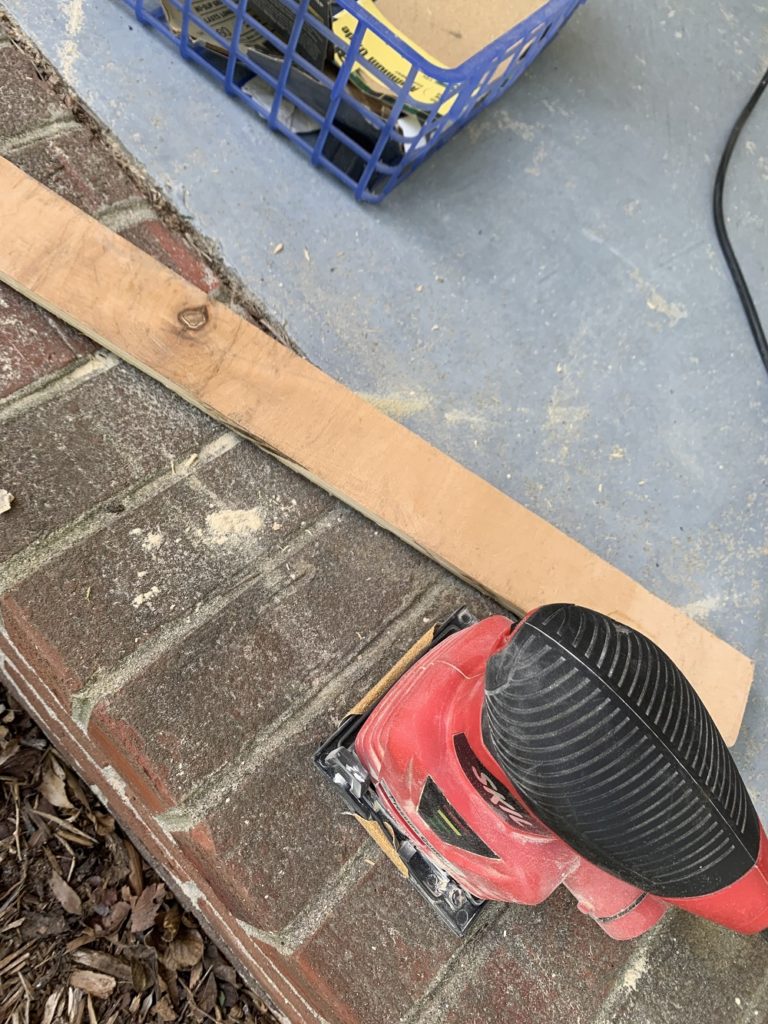
When I was happy with the way it fit, I sanded it down, painted it white and then installed it in the closet. I used small white finishing nails to tack it down, and viola it was done!!
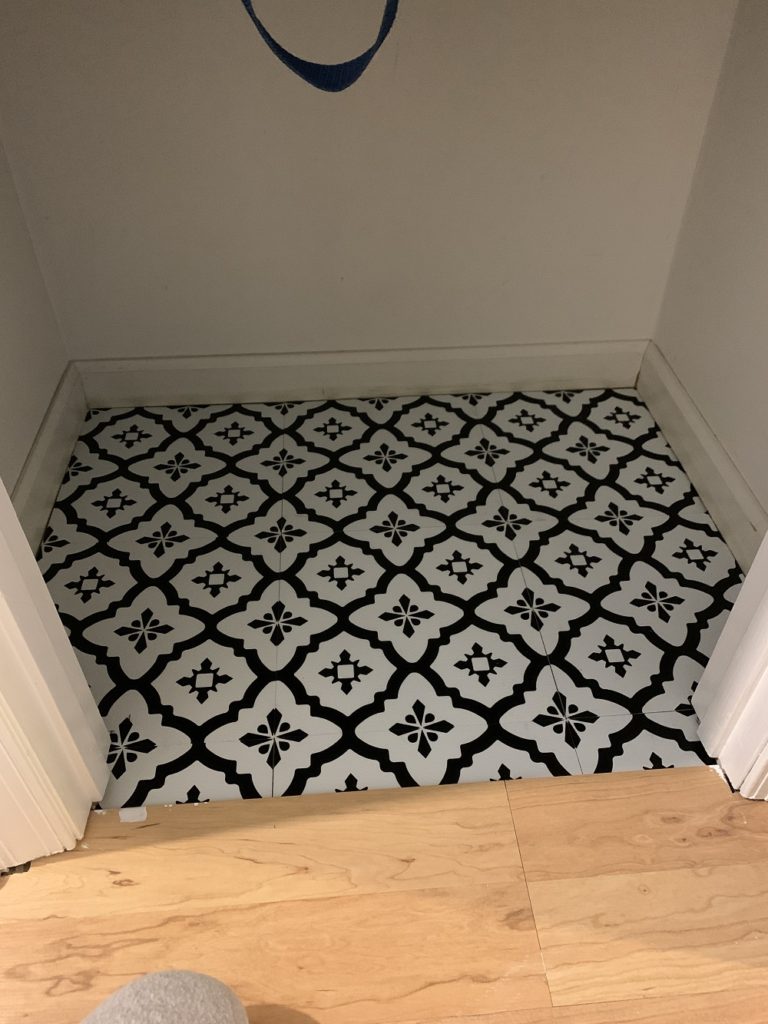
Once all this was complete I was happy, but I noticed the edge of the tile around the baseboard and it bothered me a bit. So I went searching. I found this super easy peel and stick insta-trim and thought that’s what I need. It wasn’t large where it would be greatly noticable, just small enough to cover up some of the gaps.
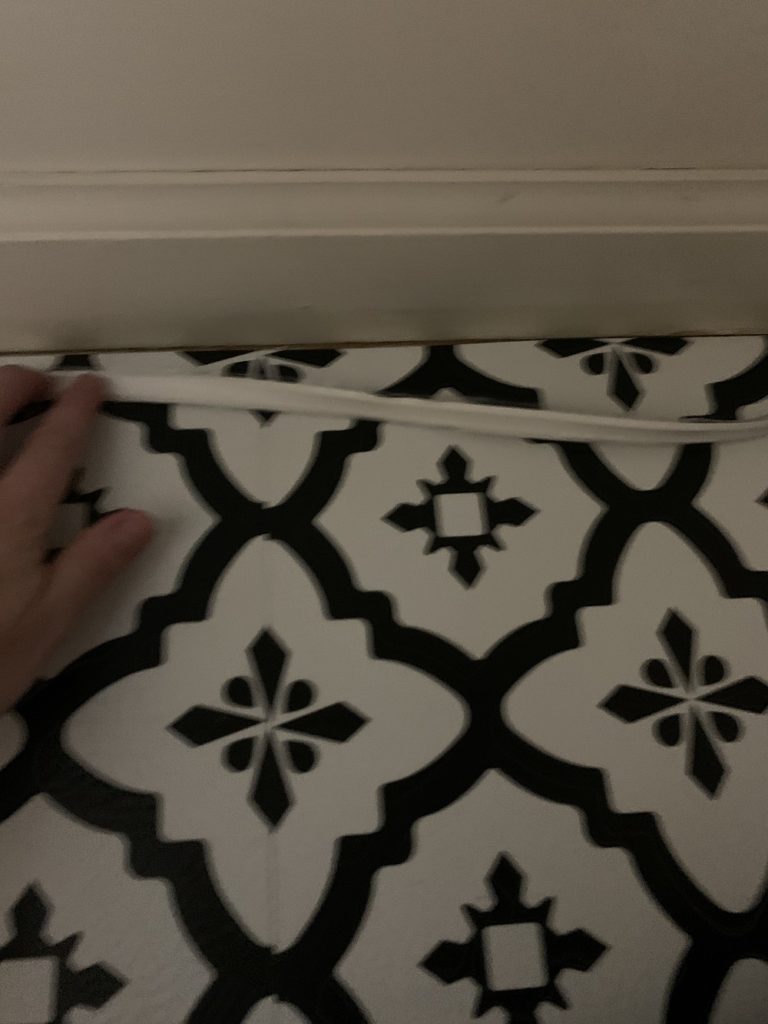
So I sat in the closet and I put it all around the baseboards to cover up the gaps. Then I sat back and admired the work! I was getting giddy about my closet!
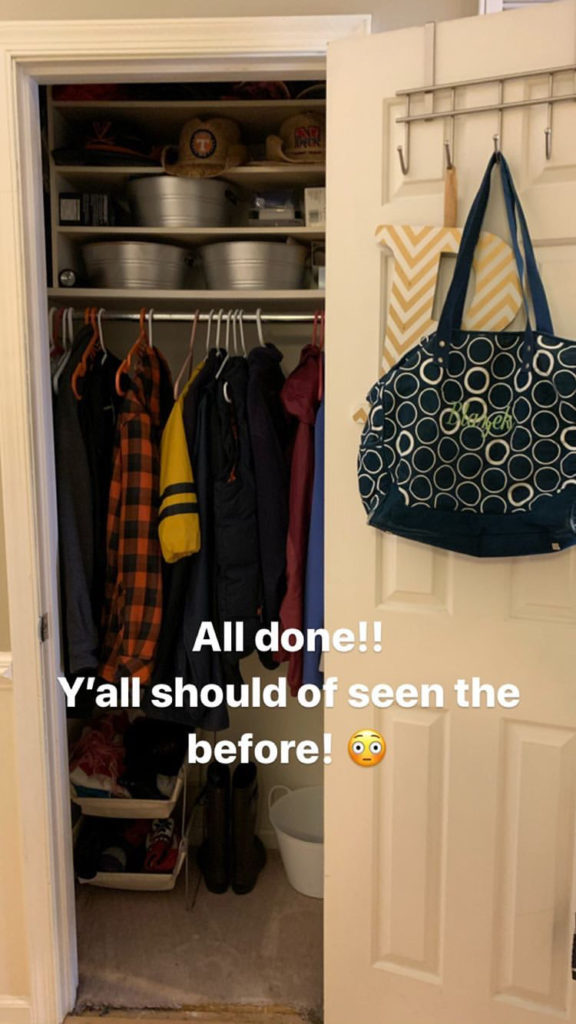
Sit back and admire your work
I hate clutter and over the years I have been slowly getting rid of it. I also hate a cluttered home. And while I have a ton (and I mean a ton) of hooks behind my front door I don’t like them all full! So I added command hooks behind the hanging coats in my hall closet. It’s a place to hang purses and such that aren’t currently being used. I also hung to black hooks on each side in front of the coats to hang umbrellas and smaller items out of the way. This keeps junk off my cute closet floor and off the hooks in the foyer.
I am so happy with the end result of my Foyer closet makeover! I love how each small detail makes the closet look fully put together. And I know what you are thinking, it’s just a hallway closet. I know, but I feel good about it and don’t mind people seeing it now. And when you feel good about a space, you tend to keep it cleaner!
I hope you enjoyed this fun makeover and I hope it inspires you to makeover a space in your house. Share with me your projects!!
And stay tuned for more DIY/makeover projects. Remember they are always done on a budget!!!


COLLEEN - Faith, Hope, Love, & Luck
Super cute! Love the floor…and that you painted the inside of the door!
KerryAnn
Thank you! Yes the floor is my favorite part and I love the accent color on the door for the pop.
Liz
Such an amazing transformation! those peel and stick floor tiles are so awesome!
Casey
That floor is awesome, what a fun idea!
KerryAnn
Thank you! I do love it! Would love to do it in an actual room like the kitchen. Hmm, next project maybe!?!?